How to Propagate Lavender?
Knowing how to propagate and grow lavender can change your life. Lavender is not only one of the most beautiful plants, but it is also quite useful.
The characteristics that it has make it one of the best plants that you can add to your garden. It is very easy to use it for a variety of things – from skincare products to clothing sachets or tasteful desserts.
In addition to being useful for people, the lavender plant is also useful for the many insects that it can attract with the gorgeous flowers and the amazing scent. It can be used as an ornament in gardens, where it will surely take the main role because of how beautiful it looks.
Once you buy your first lavender plant, you can easily propagate and spread it all over your garden. All that will be required from you is some of your time. Propagating the lavender plant is as easy as doing the process with any other plant.
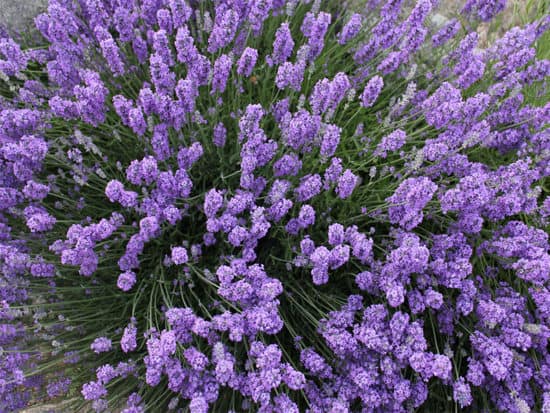
Lavender Bush:
Methods for Propagating Lavender
Those who are interested in propagating lavender will be able to choose from one of the many ways in which they can do this.
The most common type of lavender propagation includes rooting the stems in soil, the second most common method is stem rooting in water, and you can also use seeds to propagate the plant. Last but not least, there is a type of propagation that many people do not know about but it is still quite amazing – the method of layering.
Once you have decided on the type of propagation you feel the most comfortable trying out, you need to make sure that the timing for this process is right. Usually, it is best to start with the lavender propagation when the plant is actively growing.
This usually happens in mid-summer, but you should avoid starting the process if the weather is still too hot or too humid.
How to Prepare the Lavender Cuttings?
Taking cuttings from a lavender plant is not as easy as just cutting pieces of the branches away. It takes careful consideration as well as preparation in order to do everything right.
Pre-Cutting Preparations
The preparation starts even before you start cutting. The first thing that you should do is prepare the water or soil in which you will place the cuttings because you will not want to have them dry out before you put them in water or soil.
When choosing which branches to cut from, you should pay attention to whether they have flowered yet. It is best to take cuttings from branches that have never flowered, as they are known to have the most energy. Also, make sure that the lavender is mature and not too young.
Once you see a branch that fits the above-mentioned description, you can cut it from the very base of the plant. Each cutting should be only a few inches long.
Remove All Leaves and Flowers
Remove some of the leaves that are near the bottom. This will create so-called wounds on the plant’s stem, which is where you should see the roots form after some time. If you are removing the leaves with a scissor, make sure that it is sharp and disinfected.
Another thing to look for in the bush is stems that are flowerless – when the stem has a flower on it, most of the energy will be given to the bud. While this is not necessarily a bad thing, it can make the process of rooting much longer and you will want to avoid that.
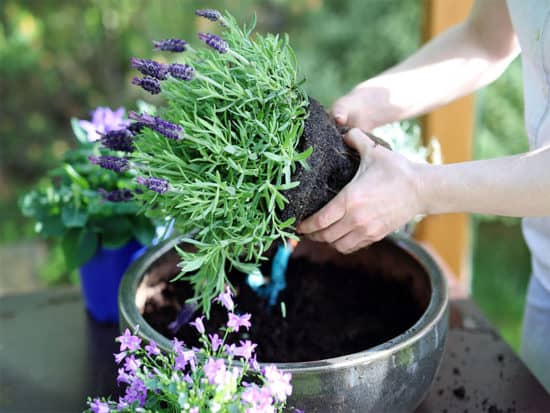
How to Propagate Lavender is Soil?
Having the cuttings ready is not enough to prepare you for the propagation process. There are a few things that you will need to get before you actually start.
Supplies Needed
First, you will need some soil that is mixed with fertilizer. Then, you will need a pot or chamber in which you will put the soil. Another thing that you will need is rooting hormone, but that is not as important as the rest.
Humidity
Once you have all of these supplies, you will need to check the humidity in the area where you live since the lavender plant likes more humid places. The humidity will also make the plant root more quickly. It is great if you live in a humid place but if you do not, you should consider putting a plastic bag over the pot to keep it moist.
Use Rooting Hormone
The next step would be to finish the cutting preparation and put them in rooting hormone. This will make them develop roots a bit faster.
Soil Preparation
Before you put the cutting into the soil, make a hole in the soil where you will want to place it. Once you have the hole ready, you can put the cutting in it and use additional soil to hold it more firmly.
Do this with all of the cuttings that you have available at the moment, but remember to keep them at least a few inches apart. When you are ready with them, you can place the put in the propagation chamber.
Additional Protection
Placing a lid or a plastic bag over the cuttings will help them stay humid even in dry weather. If you live in a place where it is humid often, you will not need to cover up the pot with anything. Place the pot wherever you like – it can be both indoors and outdoors.
The first sign that everything is okay should come from the top of the cutting, where you should see new leaves forming. It usually takes up to six weeks for the cuttings to develop roots, but once they do, the plant will grow even more rapidly than you would expect it to.
How to Propagate Lavender in Water?
When mentioning all methods of lavender propagation, the second one that we mentioned was with water. People have found it much easier to propagate lavender in water. However, this process does have some shortcomings.
Shortcomings of this type of Propagation
The first thing that you should consider is that the cuttings propagated in water will have a tougher time getting used to the soil when they are transplanted. So, they might even not survive which will mean that your efforts have been for nothing. Still, it is worth giving this propagation method a try.
Supplies Needed
When it comes to the supplies, you will only need a vase and some water this time around. You can decorate the vase with rocks or other decorations which are options and do not affect the propagating.
Water
Let’s get to the propagation itself. When you have the cuttings ready, you should take the vase and fill it halfway with tepid water. It is best to use rainwater or distilled water, but regular tap water will also do if you are unable to get another kind.
Once you have the vase ready, you should put the cuttings in it. Make sure that the water is not touching any of the leaves because this might cause them to start rotting. You should remove all the leaves touching the water and then place the cuttings back into the water.
Since the lavender plant likes humidity, it will start developing roots quite quickly when placed in water. You should leave them in the water for at least a few weeks before you start thinking about transplanting them.
How to Propagate Lavender from Seeds?
If you are not keen on using cuttings to propagate lavender, you might as well try your luck with propagating it from seeds.
Choose the Seeds
One of the most important steps in this method is choosing the type of seeds and preparing for good germination. Unlike the cuttings, the lavender seeds will need to stay indoors during their establishment, they will need more warmth and humidity in order to grow.
It can take anywhere from one to three months before the seeds start to grow.
Prepare the Soil
When it comes to the planting of the seed, you will need a pot with soil on top of which you spread the seeds. You should not put them far down into the soil, but you should still keep them covered with soil at all times. Place the pot somewhere where it will get a lot of sun and warmth.
As I mentioned, it will take a few months before the seeds start growing. Once they do, you can start thinking about transplanting them outdoors or in a bigger pot. The lavender plant can grow as a bush and it often takes a lot of space, so you will need to give it some room to grow.
How to Propagate Lavender with Layering?
There are some alternative ways to propagate layering. From those, I will mention layering and air-layering. Here is some information on them:
What is Lavender Layering?
This is a type of propagation that people do not talk about often when it comes to lavender. It is best to use it on lavender bushes that have lost their shape. Even though it is not the easiest way to propagate the plant, it can be quite fun.
Before explaining the process, I would like to talk a bit about what layering is. Well, this process includes bending branches into the ground and keeping them buried until they start to develop new sprouts. Some of the alternatives similar to this one are marcotting and air-layering.
With layering, the plant that you get in the end is much larger. So, this method is suitable for all those who want to add lavender to their gardens. Also, with this method, you can make just about any variety of lavender even if it is not available on the market at the moment.
The best time to start the process is around September when the weather starts to get cooler. Basically, the root of the plant is kept in place while some of the branches are used in order to promote the growth of new roots and new branches. This is a great way to bring an old lavender bush to life.
How to Prepare for the Propagation?
Before you start with the propagation, you should do some trimming to the bush. The longest branches are the ones that you should use, and the longer they are the better. Also, do not select branches only from one side of the plant but rather from all around it.
When it comes to the soil, it should be lighter and mulcher. Remove all weeds around the lavender branches.
Step-by-Step Guide to Layering
Take the longest branches and remove all leaves that they might have. Also, try to shave the bark as much as possible – this would include removing the surface layer and getting to the greenish layer of cambium.
Once you have completed this, you should cover the shaved part with some sterile and healthy soil mix. Do not hold back – the branches will benefit from the extensive use of the soil mix.
The next thing that you should do is attach the branch to the ground. You can do so with small metal hoops that will help you keep the branch from moving. Try using sticks to keep the branch in place as well.
Finally, make sure that the soil is moist enough. If it is dry, consider using some mulch. You should keep the branches like this for at least a year before you consider transplantation.
One of the ways in which you can promote growth is by using rooting hormones that are natural and completely safe for the plant. Also, remove all blooms that might appear on the branches because they might take too much from the branches’ energy. Last but not least, consider using sugar water to encourage healthy fungus within the plant.
Air-Layering Lavender
What you do with the branches in layering, you can do to the whole trunk in air-layering! All that you need to do in order to bring your old lavender plant to life is to air-layer its branches and trunk.
First things first, make sure that the soil is moist enough and that it has well drainage. You will not want to overwater the plant and cause it to rot. When preparing the soil, you should use soil mix, clay, gravel, and a top layer of mulch.
Once the soil is ready, scar the trunk and the branches and pile them with soil. In only a year, you will see so many new branches emerging and your plant will be vibrant and gorgeous once again.
What to Do After Lavender Propagation?
Once you have propagated the lavender plant, all that you can do is wait for a couple of months before it starts growing new leaves and branches. Once you see that the plant is thriving, you can start planning where you will transplant it.
If you are propagating lavender in water, once the branch has developed roots it will need to be placed into soil. The same goes for lavender cuttings propagated in a smaller pot. You should consider adding them to a big pot or your outdoor garden.
How to Transplant the Lavender?
Transplanting Lavender:
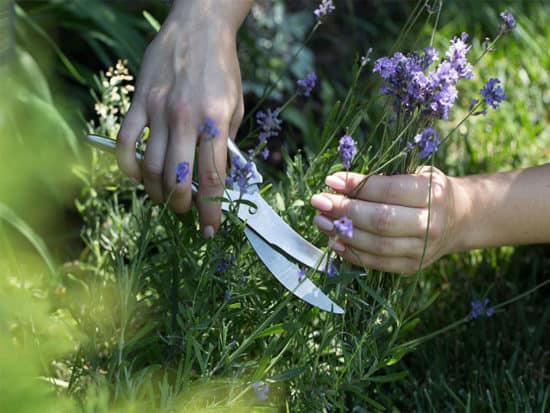
When you are doing the transplantation, you will need to check the soil and make sure that it is well-drained and not too heavy. The pH should be around 6.5 and 7.5. In the first year, the plant will also demand a lot of water which it needs to get established.
If you are planning on adding it to your garden, make sure that you do so in a place where it will get a lot of sunlight. Plant it at least 2 feet away from all surrounding plants because the lavender needs more space to grow.
All of these things will help you lessen the shock of transplantation to the plant. Do the transplantation in spring, provide the plant with enough water and sunlight and you will get a gorgeous addition to your garden!
Conclusion
Beautiful Lavender Flowers:
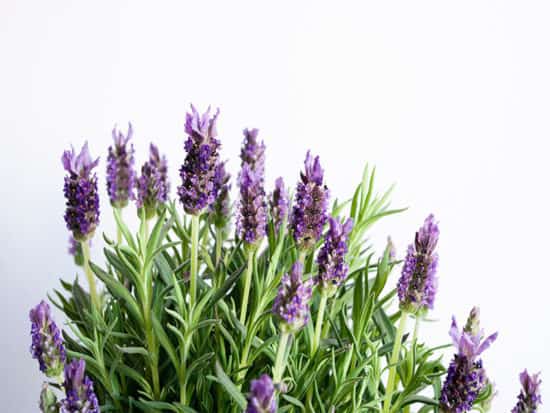
Learning how to propagate lavender has never been easier! Thanks to my detailed guide, you should be able to make your own cuttings and propagate in one of the ways that I mentioned.
As a reminder, I will repeat that you can propagate lavender by putting the cuttings into soil, water, using the branches for layering, or using both branches and the trunk of the lavender for air-layering.
The whole process of propagation could be time-consuming, but seeing the lavender bush in your garden will make it all worth it. Please consider trying out the lavender propagation techniques that I mentioned and tell me in the comments if you were able to successfully propagate the plant!
