How to Grow Giant Pumpkins?
Growing giant pumpkins is a fun contest, but you can use those tremendous squashes for decoration and meals, too. However, it requires a bit of knowledge, skills, and tips to grow giant pumpkins.
Today, I’ll be sharing the helpful steps, preparation, and tips and tricks in how to get the juiciest, the largest, and most award-winning giant pumpkins!
Why Choose Giant Pumpkins for Your Garden?
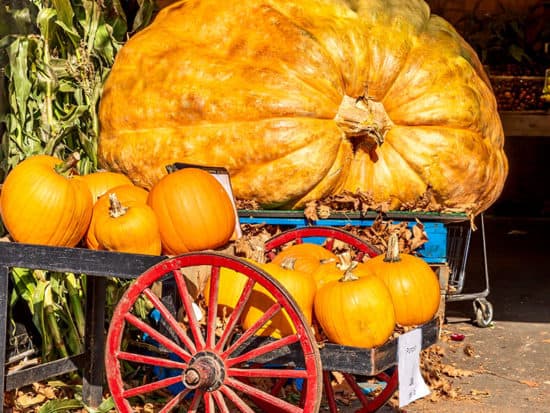
Giant pumpkins fairs are annual gatherings of gardeners and a lucrative one, too. For example, the Championship in Half Moon Bay winner for 2020 won over $16.000 for his 2.350-pound pumpkin.
Despite the competitive character of the fair, these annual gatherings are entertaining for the whole family. These fairs are held at the beginning of fall and make a wonderful start to the pumpkin season. Also, you can meet plenty of like-minded gardeners, share experiences, and get inspiration for your future gardening endeavors.
Let’s see this video to collect more understandings:
What Can You Do With Giant Pumpkins?
Giant pumpkins are attractive decorations for your porch, yard, and garden. Moreover, unused and old pumpkins serve great as a Jack o’ Lantern decoration for Halloween.
Still, there are plenty of things you do with giant pumpkins. You can hollow the pumpkin out to make a candy bowl, color it, put candles, make lanterns, etc.
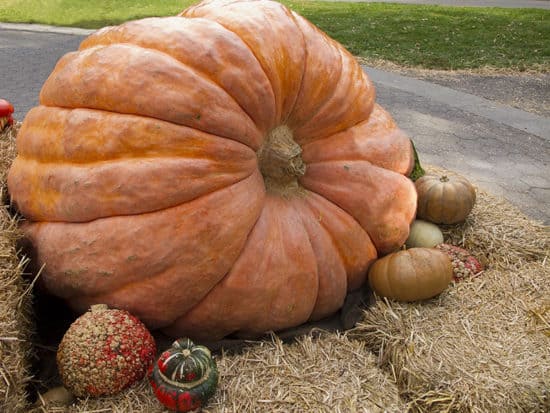
How to Grow Giant Pumpkins?
Generally, home-grown pumpkins can weigh from ten to 12 pounds, but you can work your way around it and improve your game to grow enormously big pumpkins. The key is to do your preparation on time and have an early start to boost the growth.
How to Choose the Patch?
First of all, you should start in the fall. You will need a spacious spot for your pumpkins to grow, and find the place at least six feet by six feet big. Ideally, the place is in full sun and gets eight hours of direct sun per day.
Moreover, your pumpkin patch needs to be at a ground level because you don’t want your pumpkin to roll over once it’s big, don’t you?
Also, make sure that the location has easy access to it because you will need to move and tend to the plant. Next, check how far the patch is from the closest water supply.
If you could provide shade later when the fruits develop, that would be the perfect location.
Still, don’t forget to think about other plants in your garden. If possible, find the location where vines won’t damage surrounding plants or take them over.
However, if you don’t have enough space for growing giant pumpkins you can grow them wherever you want and prune the vines as they develop. That way, the plant, other than fruit, won’t take much space in the garden.
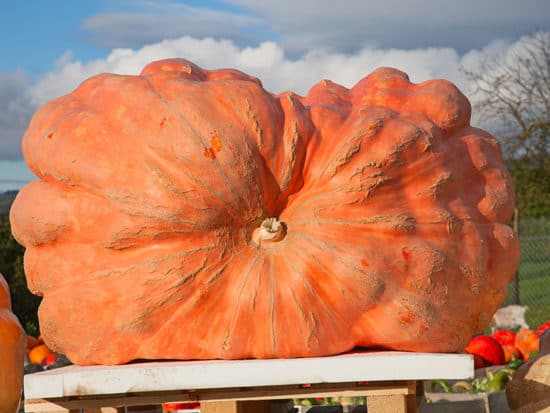
How to Prepare the Soil?
Further, you can use several things to boost the soil for pumpkins.
Compost, shredded leaves, manure, or dried grass clippings proved to work just fine. Moreover, you can add natural additives, cornmeal, molasses, or humic acid fertilizer in granules.
Whichever combination you choose, mix it with soil and let the mixture do its magic over the winter.
1. Why Organic Matter Works?
Organic matter improves the soil quality and helps it to hold the helpful nutrients for the plants.
Moreover, because amending the soil with organic matter will loosen its structure, the drainage and airflow will improve.
Further, the organic matter improves the earthworms and the activity of other beneficial microorganisms.
However, the best way to see if the soil is prepared well for growth is to test it.
2. Testing the Soil
The soil quality determines whether your pumpkins will grow to their full potential.
If you want to do everything in your power to ensure optimal growing conditions for giant pumpkins, you can test the soil in spring.
Find the appropriate lab in your town to perform the testing. Ask them how to take the samples correctly.
The key is to learn how to interpret the results and plan your next moves.
3. Lab Results Interpretation
When interpreting the results, you have three options – the ideal pH which doesn’t require action, low and high pH levels.
- Low pH Levels
When the results come with levels lower than 6.5 pH, you can amend the soil with lime. Usually, it comes in the chip or finer form.
Add moisture to the soil, and then apply the lime. If the soil is dry, the lime won’t improve the soil at all.
The alternative to lime is wood ash. Still, just before the season starts, you should apply wood ash, but it will take longer to show results.
- High pH Levels
Aluminum sulfate and sulfur are great for lowering the soil pH level. You can get them from the local garden center. If you are looking for fast results, I recommend aluminum sulfate.
However, whichever product you use, make sure to check the instruction on the packaging regarding your soil and size of space.
How to Choose the Seeds?
If you are dedicated to growing giant pumpkins, your best shot is with Atlantic Giant seed. The botanical name is Cucurbita maxima, and plenty of experienced growers choose it for their pumpkins.
You can get your seeds from local gardening centers or other growers, both local and international. However, if you choose to order the seeds internationally, the seeds need to come with the phytosanitary certificate, which ensures that it is free from diseases.
Whichever location you choose to get your seeds from, make sure it is a fast-growing seed and that it provides sufficient orange color with a weight that exceeds the predicted growth rate.
What to Do With Seeds?
When growing giant pumpkins, it is important to prepare the seeds correctly once you get them. There are a few things you will need to boost germination, such as a paper towel, plastic zip bag, marker and marker peg, seed raising mix, warm water, and an appropriate pot. The nail file is also a useful thing to have around.
First of all, you can use the nail file to sand the edges of the seeds avoiding the tip of the seed. Additionally, sandpaper can be useful for this step, and it is quicker, but the nail file ensures a gentler approach.
Next, put the paper towel in the warm water, squeeze the excess water and place the seed in the middle of the paper, folding it back carefully.
Then, place every prepared seed in the zip bag and use a marker to label the bags.
You can help the germination process by placing the bags somewhere with a constant source of warmth. Some examples include the top of the fridge, sunny window, or the top of the water cylinder.
Additionally, some experienced growers use heating mats for this, but if you are a first-time giant pumpkin grower, the top of the fridge will be just fine.
Depending on the warmth, the germination may occur somewhere between three and ten days. You will know that the seeds are ready for the pot when they are swollen, and there is a small root poking through the top of the seed.
- Placing the Seeds Into a Pot
Lastly, fill the pot with seed raising mix and put the seed approximately 1 inch below the top level. There aren’t proofs that placing the seed with the pointy side down or flat works better. But, if you have several seeds to plant, you can run an experiment and see what will have the best results.
When the first leaves appear, you can move your seeds in the prepared pumpkin patch.
How to Transplant the Seeds Into a Pumpkin Patch?
Transplanting the seeds is important, so there are several things to consider. Ideally, you should transplant the seeds after the frost season, but if the seedlings are aged enough and you still expect some frosts, you might need early protection.
Additionally, because the vine grows in the opposite direction from the first leaf, you should be careful when transplanting.
1. How to Harden up the Plants?
Hardening is a useful technique that helps the plant to survive the shock from sudden temperature changes in the pot and soil. Moreover, it will prepare the plant to grow faster and retain moisture.
To harden the plant up, start by leaving the pots in a sheltered location in partial sun for three hours the first day. Then, gradually increase the length of the outside pot time, but bring the pots indoors for the night.
The process shouldn’t last more than seven days, and once it ends, you are ready to transplant the plants.
2. Should You Prepare Mounds?
In the early stage, you can create mounds to help your seedlings grow faster and healthier.
Mounds shouldn’t be taller than 12 inches and you should make them on a slight angle to help the drainage and keep the soil above the ground.
Further, you should dig the hole about the size of the pot and put the seedlings in.
Dig a hole that is as wide and as deep as the pot your seedling is, facing the hole. Next, put the soil back in the hole and water it around the plant base.
If you are growing several plants, keep the space between two plants 13 or 14 inches. However, if you have limited space, you can plant two plants close to each other, facing the vines in opposite directions.
Let’s see this video to collect more understandings:
3. How to Make an Early Protection for Seedlings?
The seedlings are fragile during the first couple of weeks after transplanting. You might need to protect them from colder temperatures and winds.
Gardeners use different structures, such as a cloche or greenhouse, to ensure protection and provide sufficient ventilation when the temperature rises.
You can use a cardboard box, but remember to remove it in the morning. Still, experienced gardeners consult the forecast to prepare everything they need for the seedlings, including protection.
Ideal Growing Conditions for Giant Pumpkins
Once the seedlings are established, you need to maintain your plants – water, fertilize, and prune them to achieve the best results.
Let’s go briefly through ideal growing conditions.
1. Watering
Giant pumpkins love water. When the soil is wet but not soggy, the plant can take enough oxygen and diluted fertilizers.
When the soil is overly dry, the plant will deepen its roots, but it won’t affect above-ground growth.
Watering is essential when the pumpkin gets the most weight each day.
You can water your plants with above the ground sprinkles, drip lines, or garden hose and watering can. Pick the method that works the best for you!
2. Fertilizing
Fertilizing is especially beneficial for giant pumpkins. You can choose between traditional fertilizers and organic types.
Traditional fertilizers include nitrogen, phosphorus, and potassium-based fertilizers.
Start with nitrogen fertilizer on the soil, as it is most helpful at the beginning. Never apply it on the leaves or vines, because it can damage them. Next, once the flowers appear, switch to phosphorus fertilizer to help the roots and fruit development.
Lastly, once you notice the first fruits, you can use potassium to boost the fruit’s growth.
Organic fertilizers use fish or sewed materials, and they can have slightly slower effects.
Whichever fertilizer you choose, remember to start slowly and resist the urge to overdo it. Fertilizing with appropriate fertilizer once or twice per week can be enough and have the best results.
3. Pollination
When the first flowers appear on your pumpkin vines, you have to decide if you will leave the bees to pollinate the plants or help them with hand pollination. Hand pollination is effective because you can hand-pick which flowers to pollinate with the highest chances for success.
To get the best results, pick the flower on the main vine, which is around 13 inches from the plant base.
Before you hand-pollinate your flowers, learn the difference between male and female flowers. Female flowers have a tiny pumpkin in the center, while males don’t.
To hand pollinate your flowers, open the petals of male flowers and scrape the pollen. Then, apply the pollen to the female flower.
I suggest you pollinate your flowers in the morning before bees do it.
4. Picking the Favorite
If you want to grow a giant pumpkin for a contest, you should choose the favorite pumpkin early, and cut the rest fruits, so all helpful nutrients go to the chosen one.
You can pick the one that grows faster by measuring each fruit daily and recording the results. But, keeping an eye on the pumpkins and noticing growth patterns is enough.
5. Pruning
Once your pumpkins start to grow fast, you will have to help them achieve the best growing pattern. You can do it by pruning or burying the vine.
You can bury the vine in those places where leaves anchor the plants. Therefore, it prevents wind damage from the plant by holding the vine attached to the ground.
You can also use stakes to direct the vine and train it to grow in the direction you want. Once the vine starts growing, remove the stake and place it in another place to direct the vine again.
Additionally, you can deadhead the vine when it reaches the predetermined length. It will help the plant to connect fully to the already grown vine.
6. Shade
Once the pumpkins get the size of a basketball, you need to ensure shade. It will prevent the sun from damaging the growth rate. If you don’t do it, the sun may cause the pumpkin to ripen prematurely and stop growing.
You can use a sun umbrella to ensure shade or build a hoop type cover. Additionally, some growers use sheets or towels, but you will have to change the towel after rain to prevent mold development.
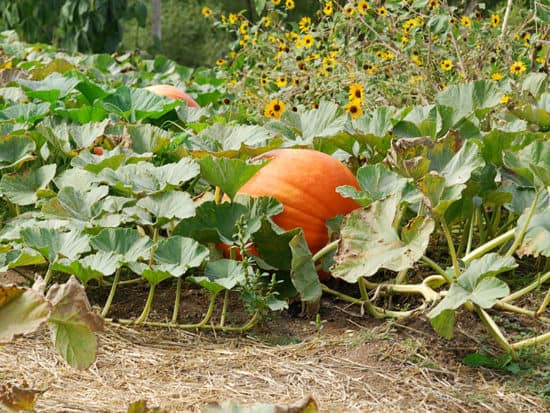
Pests and Diseases
If you have followed all previous steps, you probably won’t have any pests or disease issues with your pumpkins. Still, let’s have a brief overview of the most common giant pumpkins pests and diseases.
1. Powdery Mildew
Similar to other vine plants, such as cucumbers, powdery mildew can occur in hot and humid areas in the late summer.
Unfortunately, it spreads fast and slows down the growth of the pumpkin.
To prevent it, you should water your plants only in the evening and around the roots and vines.
Additionally, you can use products such as fungicide to prevent or deal with powdery mildew. If the product helps, the plant will recover fast and continue to grow. Unfortunately, if it’s too late, you should remove the plant from the garden.
2. Rotting Stems
Soft or rot stems can occur anytime. You can notice them by small and soft spots on the plant. Once you see it, you should gently remove the spots with a toothbrush, rinse the plants and let air dry.
An additional step is applying the fungicide once a week to help maintain healthy stems.
Saving the Seeds
If you plan to grow giant pumpkins next year, you can save the seeds easily. Choose the best pumpkin (if you have more than one), and once you detach the pumpkin from the vine, cut it and extract the seeds.
Wash the seeds thoroughly to remove the gunk, and spread them on newspaper to air dry for at least three weeks.
Once the seeds are dry, put them in a sealed bag with air holes, label them and save them for the next year!
Growing Pumpkins: The Truth
Growing giant pumpkins is an interesting gardening task with a competitive character. However, if you decide to do it, you will have to put the most effort into seeds and soil preparation.
Once you start on the right track, you should monitor the pumpkins, water them thoroughly, apply the appropriate fertilizer, and a few tricks. It may seem challenging the first year you do it, but it will get easier over time!
Have you ever grown giant pumpkins? How big was the largest one?
Share the article with your friends and family, and start growing your pumpkins together!
